Python is a widely used high-level programming language first launched in 1991. Since then, Python has been gained popularity and is now considered one of the most popular and flexible server-side programming languages.
Unlike most Linux distributions, Windows does not come with Python installed by default. However, you can always install Python on your Windows Local Machine.
Prerequisites
- A system running Windows 10 with admin privileges
- Command Prompt (Comes by default)
Python 3 Installation on Windows
Step 1: Select version of Python to Install
The installation process consists of downloading the official Python .exe installer and running it on your system.
The version you need depends on what you want to do in Python. For example, if you are working on a project already coded in Python 2.x, you probably need to install the Python 2.x version. If you are starting from scratch, you can install the latest version.
If you are new and learning to code in Python, we recommend you to install the latest version of Python.
Step 2: Download Python Installer
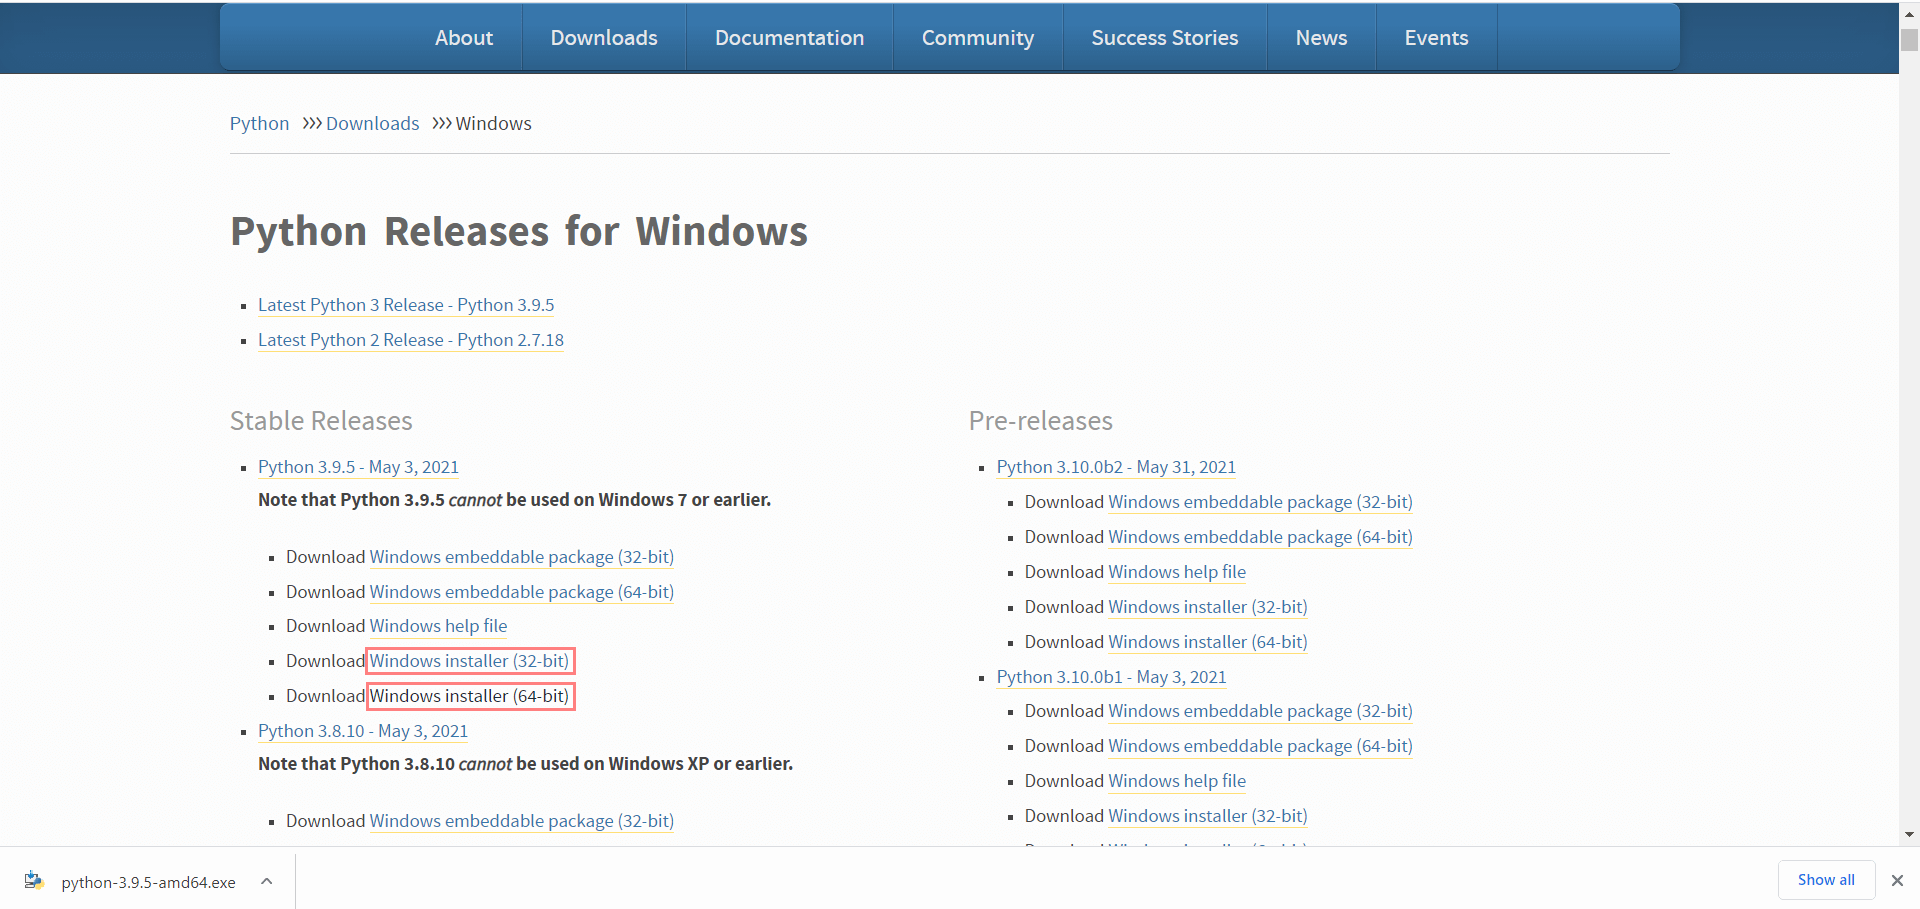
- Open your web browser and navigate to the Download for Windows of the Official Python Website.
- Search for your desired version of Python. At the time of writing and publishing this article, the latest version of the Python 3 release is 3.9.5, while the version of the Python 2 release is 2.7.18.
- Check whether your system is running on 32-bit or 64-bit by going to File Explorer > Open This PC > Right Click > go to Properties. You will find System Type, where it was mentioned whether it is 32-bit or 64-bit Operating System.
- Select a link to download either the Windows Installer (64-bit) or Windows Installer (32-bit) based on your system and download it.
Step 3: Run The Installer
- Run the Installer you have just downloaded. In this example, we have downloaded Python 3.9.5
- Tick or Check on ‘Add Python 3.9 to PATH‘ and click on Install Now. The installation process will begin, wait till the installation process completes.
- After that, you will see, “Setup was successful“. If you see something like, “Disable Path Length Limit” click on it and follow the process. At last, click on the close button.

Step 4: Verify Python & pip Was Installed or Not
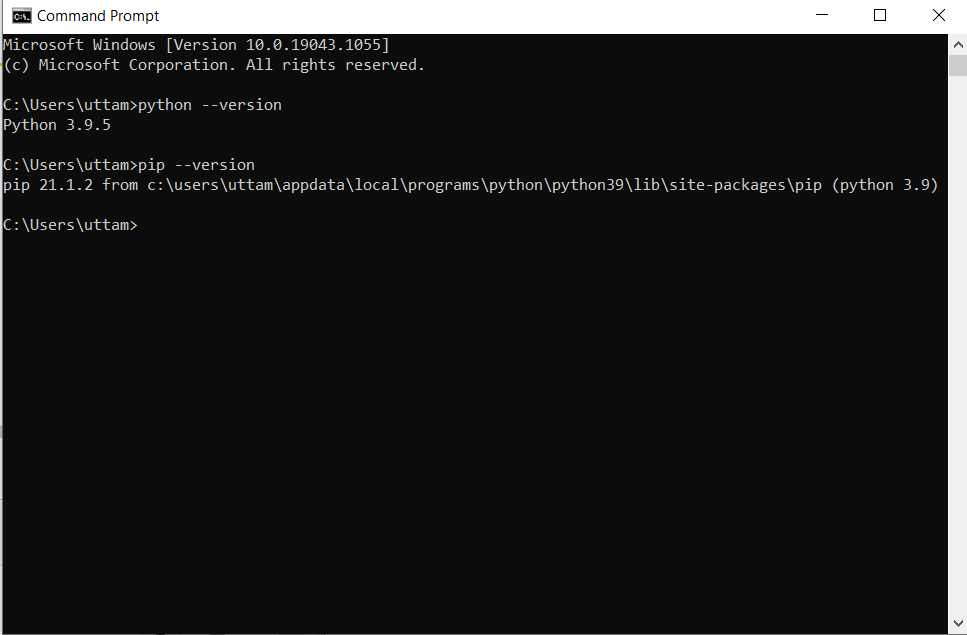
- Go to Start Menu and open CMD or Command Prompt.
- Type python –version in the console.
- Type pip –version in the console.
- If Python and pip were installed successfully, you should see the following output.
Conclusion
In this tutorial, we have seen how to install Python 3.x on Windows 10. If you are installing a different version of Python, you can expect a similar process.
Remember, choose your version carefully, and make sure that you have pip installed.
Happy Programming!
Read more related to Technology, Programming related stuff on EGrasps.